WAY 2 – Using Registry
Registry Disclaimer: The further steps will involve registry manipulation. Making mistakes while manipulating registry could affect your system adversely. So be careful while editing registry entries and create a System Restore point first.
1. Press  + R and put regedit in Run dialog box to open Registry Editor (if you’re not familiar with Registry Editor, then click here). Click OK.
+ R and put regedit in Run dialog box to open Registry Editor (if you’re not familiar with Registry Editor, then click here). Click OK.
2. In left pane of Registry Editor window, navigate to following registry key:
HKEY_LOCAL_MACHINE\SOFTWARE\Policies\Microsoft\Power\PowerSettings\0e796bdb-100d-47d6-a2d5-f7d2daa51f51
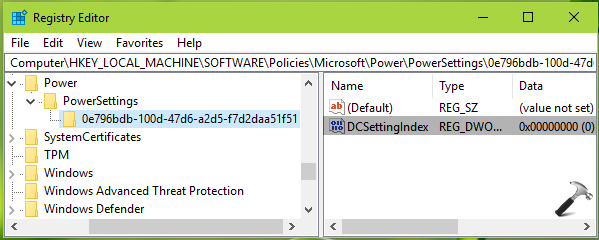
3. In the right pane of 0e796bdb-100d-47d6-a2d5-f7d2daa51f51 registry key, set the DCSettingsIndex named registry DWORD (REG_DWORD) to 0. If the DWORD or registry key doesn’t exists, you need to create them manually.
The above mentioned DCSettingsIndex DWORD prevents password requirement after sleep, when your system is on battery power. You need to similarly create ACSettingIndex DWORD under HKEY_LOCAL_MACHINE\SOFTWARE\Policies\Microsoft\Power\PowerSettings\0e796bdb-100d-47d6-a2d5-f7d2daa51f51 and set it to 0 for preventing password requirement after sleep, when your system is connected to power source or plugged in.
Close Registry Editor and reboot the machine to make changes effective.
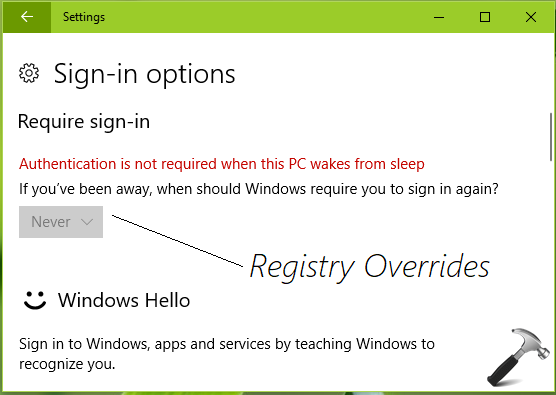
After reboot, your system would no longer ask to sign-in after sleep. Note that registry way always overrides the Settings app way. That is, you can’t follow WAY 1, if you’ve already followed WAY 2.
Hope you find the article useful!
from : https://www.kapilarya.com/how-to-disable-password-requirement-after-sleep-in-windows-10
No comments:
Post a Comment